- $USD
- English (United States)
- Hire an Expert
- Get Support

The location of a business always matters either you have an eCommerce website that completely deals in online sales or a chain of departmental stores. Firstly, the physical address of a business builds customer trust and makes them believe that it really exists. Secondly, you always need to direct customers to the nearest locations where you operate, so that they can quickly find products around. Setting up a store location on your online shop can save customers’ time and money in reaching you through any on your outlet or franchise.
The default platform of WooCommerce do not include the display of different store locations on a single page along with the direction, that’s why you need a plugin to have such a facility on your website. We recommended WooCommerce Store Locator among others for its additional features and easy configuration. To help you easily setup different store locations on your website, we have described the whole process in a step by step guide as follows.
Step 1: Download the Store Locator plugin from here (WooCommerce Store Locator)
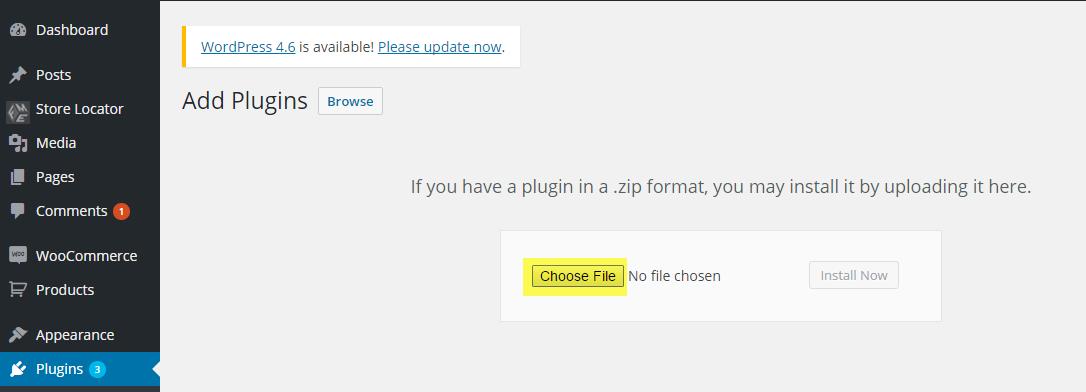
Step 2: To install the plugin, go to WordPress Admin/Plugins/Add New. Click ‘Upload Plugin’ and select the files you have downloaded in the previous step. Click Install and it is done.
 Step 3: Click Installed Plugins to view the application you have just installed and activated it.
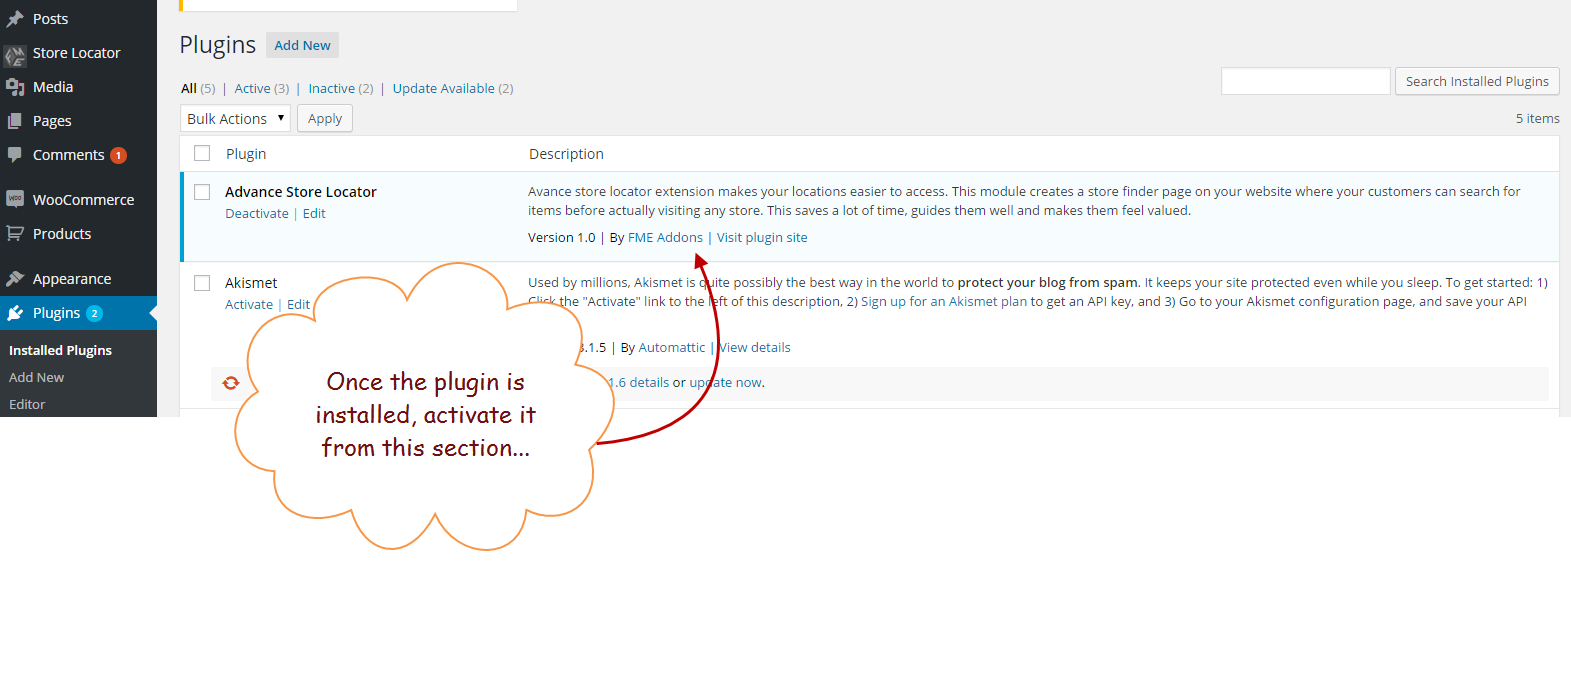 Step 4: After activation, navigate to a separate ‘Store Locator’ tab in the right column of our admin panel. In the ‘Manage Store’ menu, you can view, edit and delete the stores without any hassle.
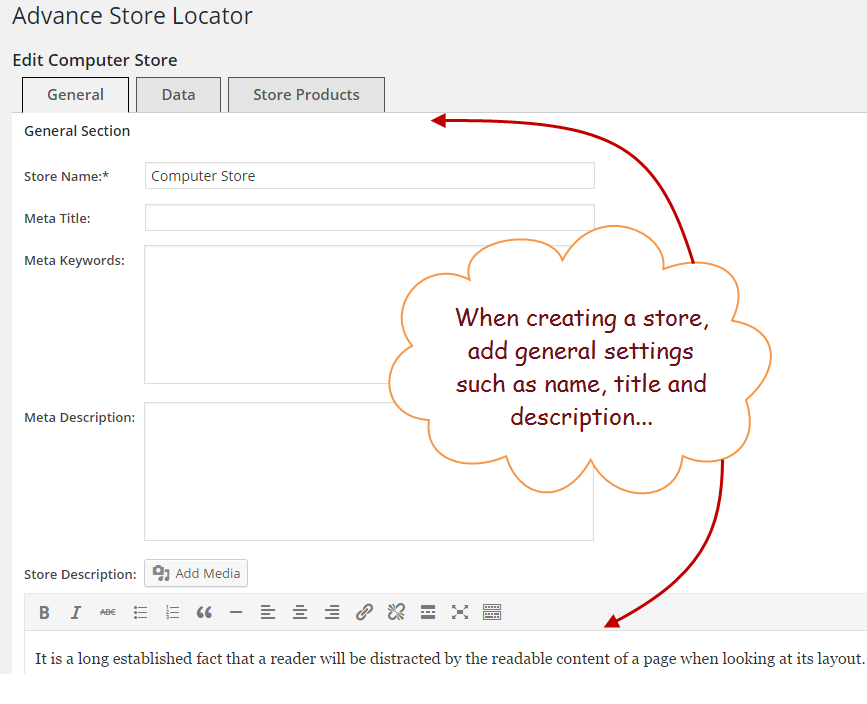
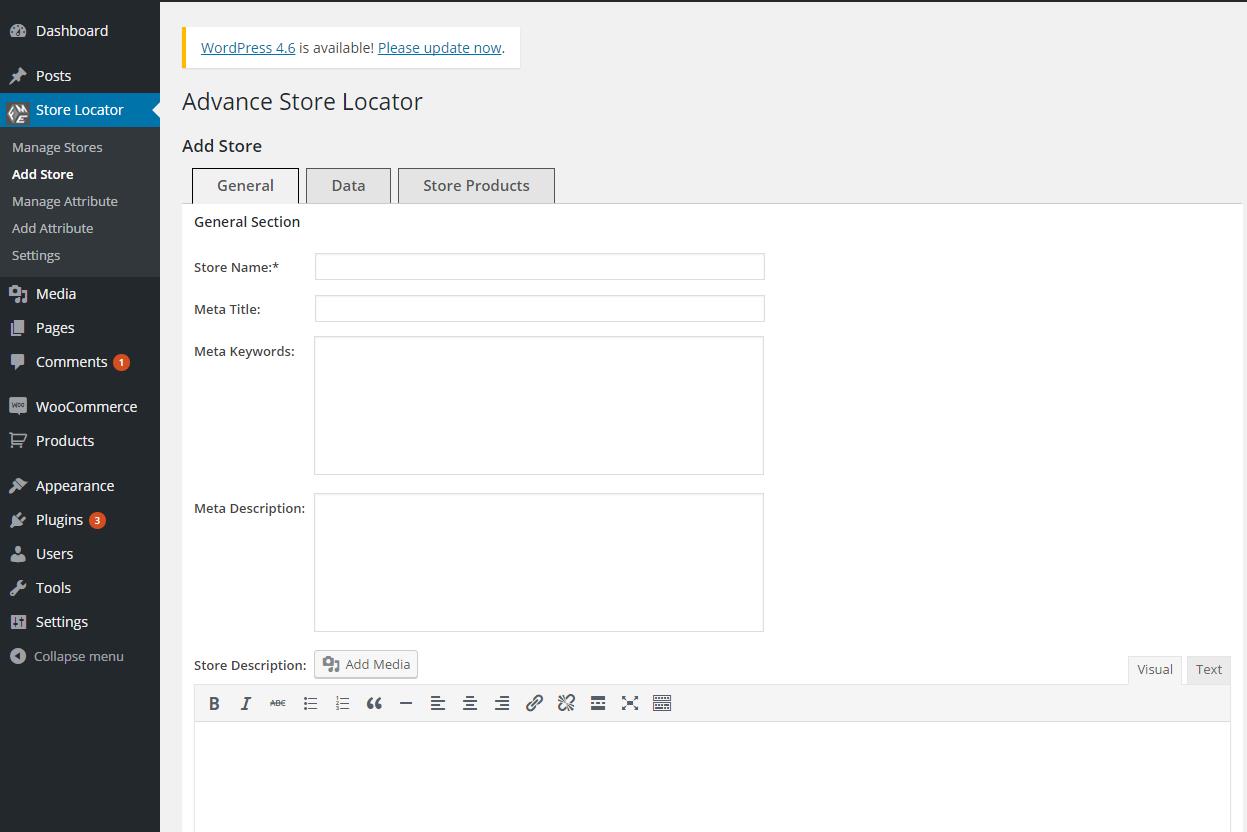
 Step 5: Delete the default stores that are created for testing and create new by clicking the Add Stores in the same menu. Write a store name, Metadata, a short description of your store, and save it.
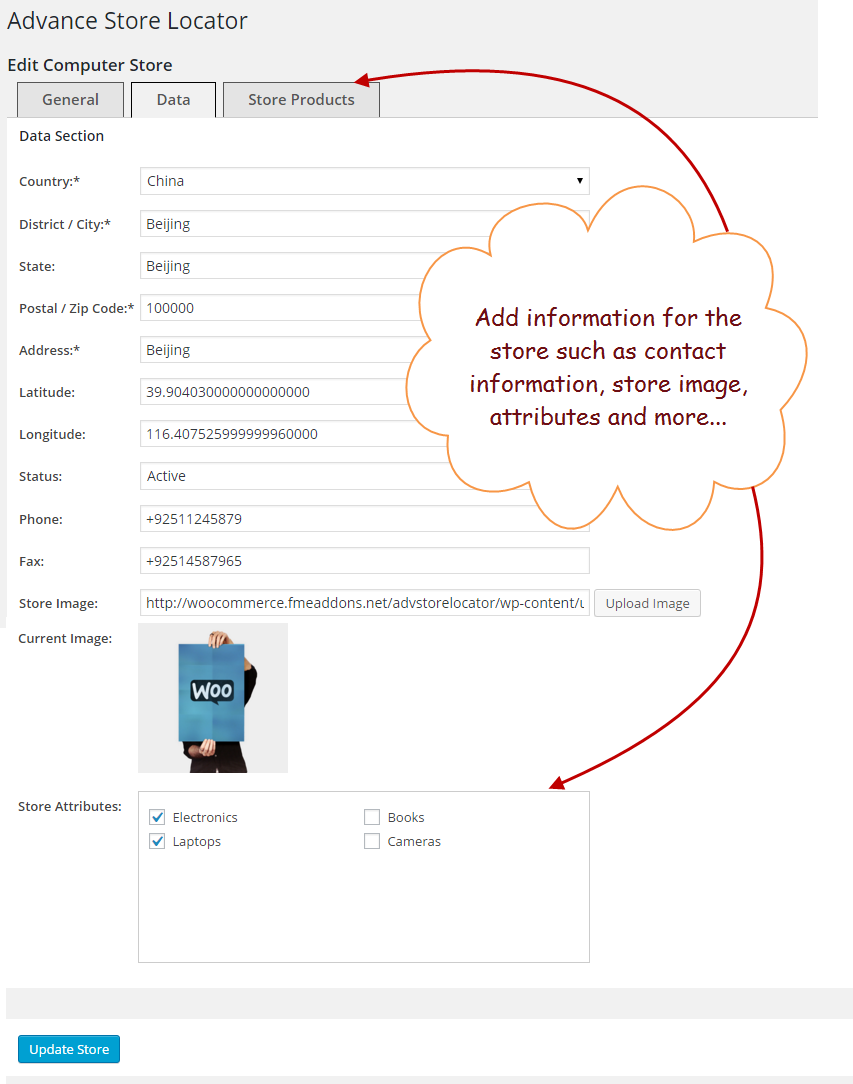
 Step 6: Stay on the same page, and click Data. here, provide the complete data and address about a store location. Add latitude and longitude of the specific address and the image of the store for the ease of customers.
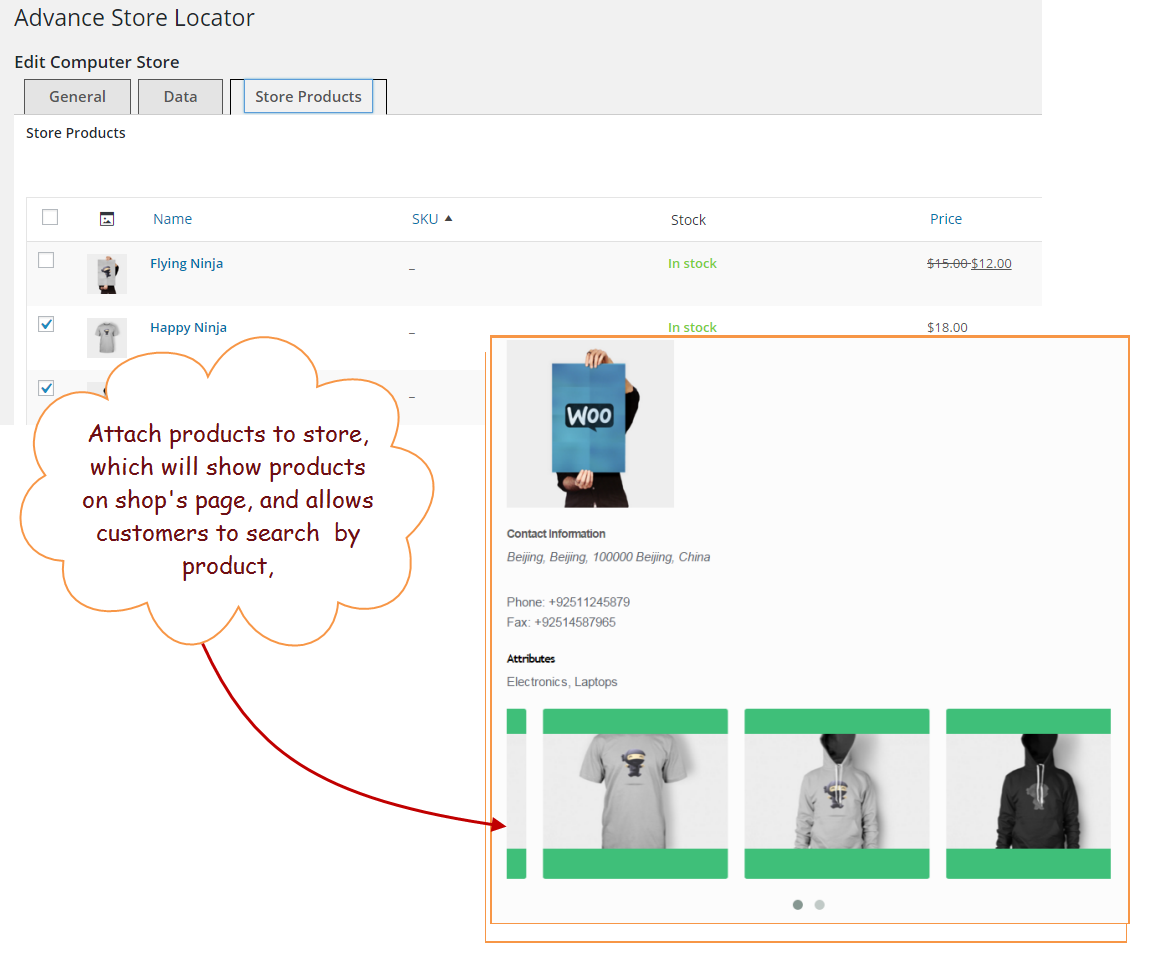
 Step 7: Now, move to the ‘Store Products’ tab and select the products from the list to associate them with the store you have just created.
 Step 8: Move to the ‘Manage Attributes’ tab to activate or deactivate store-specific attributes which help customers to find the nearest store.
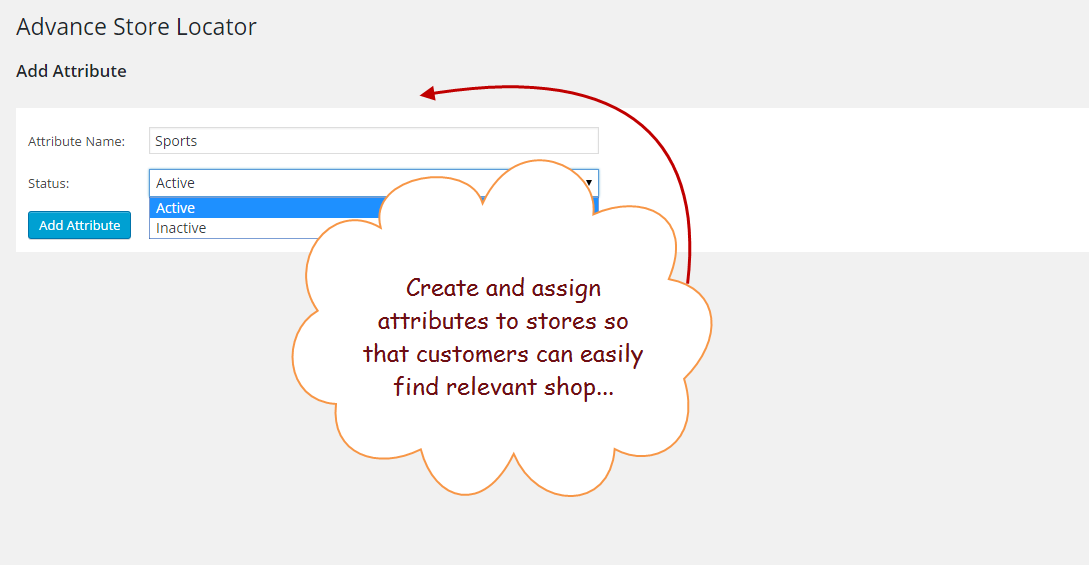
 Step 9: Click ‘Add Attribute’ if you think the above-discussed attributes are not relevant to your business and you need to create new ones.
 Step 10: As you are done with the basic settings, you can configure general settings of the plugin by clicking settings under the Store Locator menu.
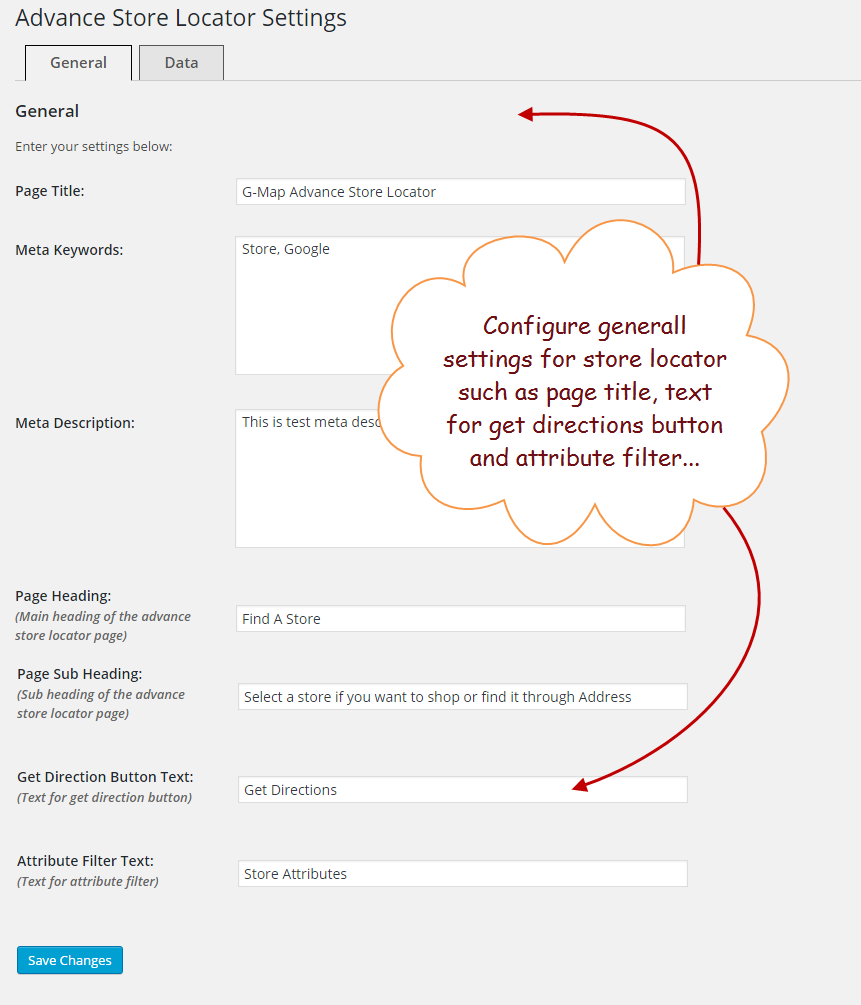
 Step 11: Click the General tab and enter Meta information to ensure the online exposure of the store location page. Add a custom title for the page that displays all your store locations. you can customize the heading, subheading and get direction buttons as well.
 Step 12: Save the changes, and move to the Data tab. Enter a standard latitude and longitude, which serves as a default location of your store. Select other options as per your business requirements.
 Step 13: After saving the configuration settings, you can check the plugin as how the stores display. Go to the home page of your website and click Advance Store Locator or any other title you have selected for the page. It will appear something like this.
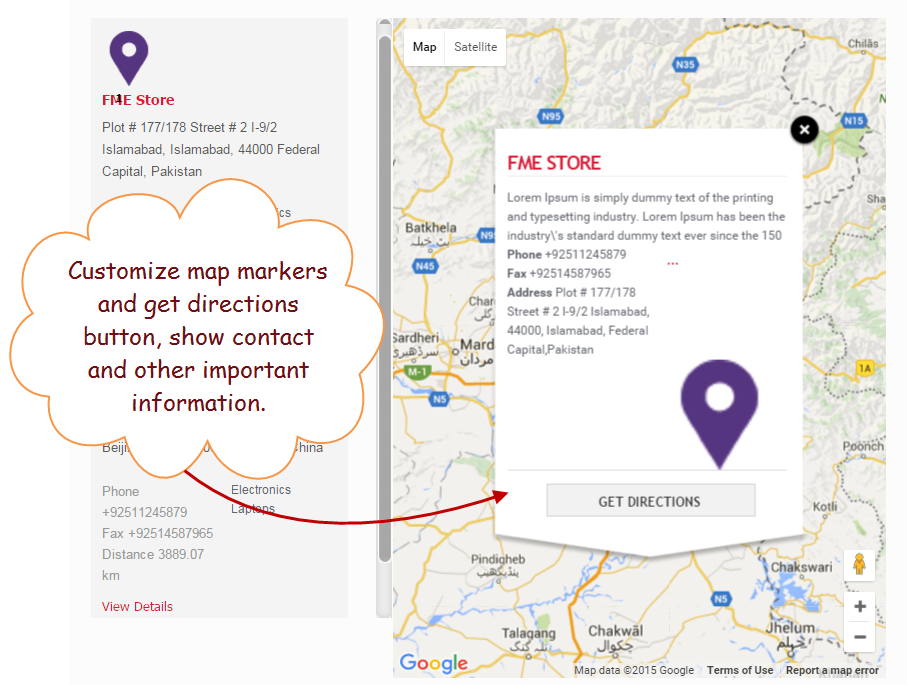
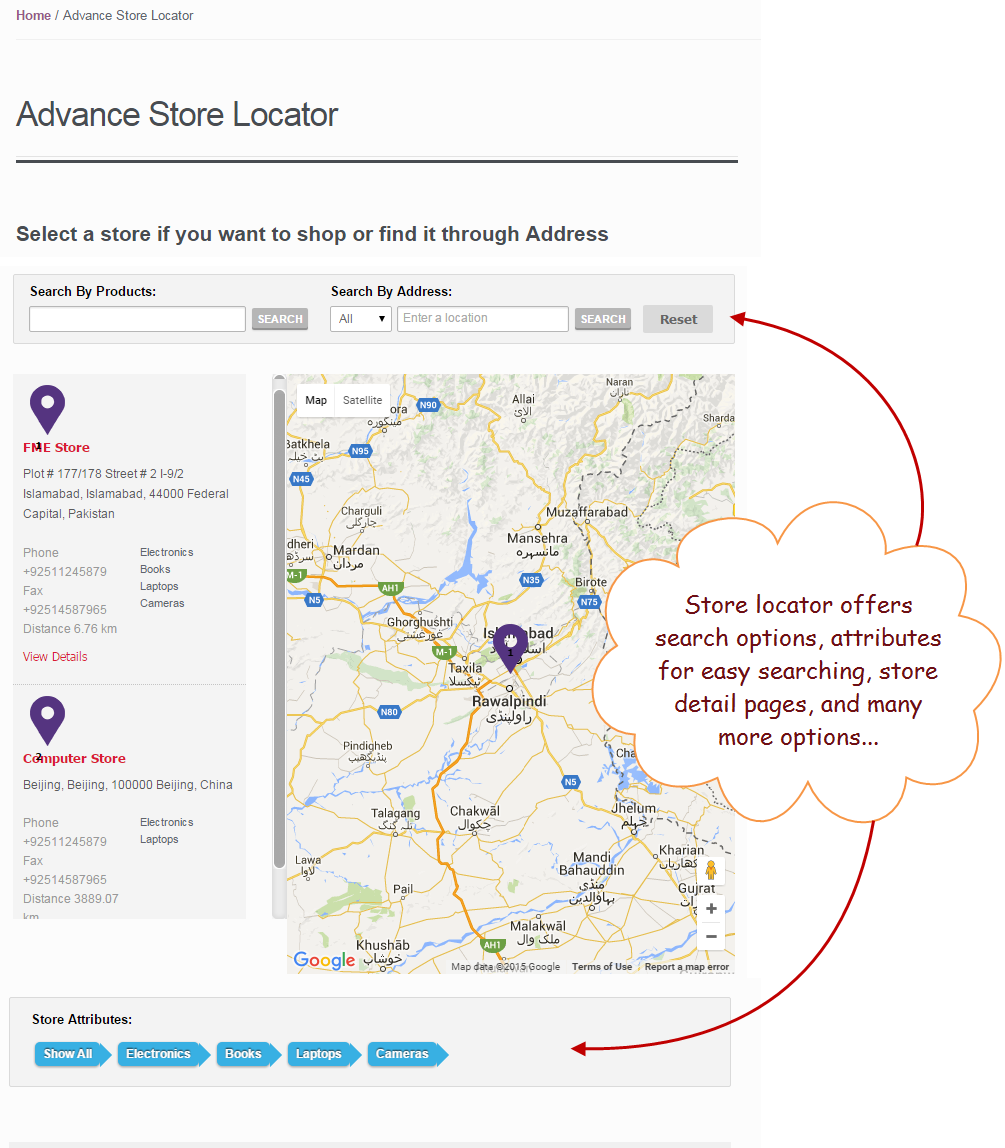 Step 14: Click on any of the map markers to know how the information is presented. You can always make changes to make more useful information about the store.
 Step 15: The display of stores on your eCommerce website shows that you have perfectly added them from the backend. Congrats you have successfully added store locators to your WooCommerce powered online store.
By setting up store locators on your website, you can relieve customers in finding a store nearest to their home address and find the availability of products as well. We have tried to guide you through the installation and configuration of a simple Store Locator plugin in an easy guide, Hope it will work well for you. If any problem arises, you need to instantly contact the support team for resolving the issue.
Step 15: The display of stores on your eCommerce website shows that you have perfectly added them from the backend. Congrats you have successfully added store locators to your WooCommerce powered online store.
By setting up store locators on your website, you can relieve customers in finding a store nearest to their home address and find the availability of products as well. We have tried to guide you through the installation and configuration of a simple Store Locator plugin in an easy guide, Hope it will work well for you. If any problem arises, you need to instantly contact the support team for resolving the issue.
Step 3: Click Installed Plugins to view the application you have just installed and activated it.
Step 4: After activation, navigate to a separate ‘Store Locator’ tab in the right column of our admin panel. In the ‘Manage Store’ menu, you can view, edit and delete the stores without any hassle.
Step 5: Delete the default stores that are created for testing and create new by clicking the Add Stores in the same menu. Write a store name, Metadata, a short description of your store, and save it.
Step 6: Stay on the same page, and click Data. here, provide the complete data and address about a store location. Add latitude and longitude of the specific address and the image of the store for the ease of customers.
Step 7: Now, move to the ‘Store Products’ tab and select the products from the list to associate them with the store you have just created.
Step 8: Move to the ‘Manage Attributes’ tab to activate or deactivate store-specific attributes which help customers to find the nearest store.
Step 9: Click ‘Add Attribute’ if you think the above-discussed attributes are not relevant to your business and you need to create new ones.
Step 10: As you are done with the basic settings, you can configure general settings of the plugin by clicking settings under the Store Locator menu.
Step 11: Click the General tab and enter Meta information to ensure the online exposure of the store location page. Add a custom title for the page that displays all your store locations. you can customize the heading, subheading and get direction buttons as well.
Step 12: Save the changes, and move to the Data tab. Enter a standard latitude and longitude, which serves as a default location of your store. Select other options as per your business requirements.
Step 13: After saving the configuration settings, you can check the plugin as how the stores display. Go to the home page of your website and click Advance Store Locator or any other title you have selected for the page. It will appear something like this.
Step 14: Click on any of the map markers to know how the information is presented. You can always make changes to make more useful information about the store.
Step 15: The display of stores on your eCommerce website shows that you have perfectly added them from the backend. Congrats you have successfully added store locators to your WooCommerce powered online store.
By setting up store locators on your website, you can relieve customers in finding a store nearest to their home address and find the availability of products as well. We have tried to guide you through the installation and configuration of a simple Store Locator plugin in an easy guide, Hope it will work well for you. If any problem arises, you need to instantly contact the support team for resolving the issue.